Guest Post: Paper Bead Tutorial
Good afternoon (or morning, or evening, or night ;) ladies! What have you been up to this Tuesday? I spent the first part of my day babysitting and am now preparing to fulfill the rest of the day's duties before heading off to our video Bible class tonight, and hopefully slipping in a nap somewhere.
Meanwhile, I have some inspiring reading material here for you! Kelly-Anne, the blogger behind Beautiful Girlhood,was kind enough to put together this fun paper bead tutorial as a guest post. Enjoy this DIY project and be sure to check out Kelly-Anne's blog for more crafts, as well as recipes, encouraging words and more. :)
How to Make ~ Paper Beads
Hello sweet readers of Sunday Best and all the Rest!
I am Kelly-Anne, and I write over at Beautiful Girlhood to encourage and inspire young ladies to pursue Godly femininity...
I am just delighted to have this wonderful opportunity to share one of my favourite craft tutorials for handmade paper beads with you!
These beads are so simple to make, yet look quite elegant when paired with an outfit!
~

…Shall we begin…?

Let’s see…you will need:
Pretty paper ~ The print may be as large, small or intricate as you like, as once the paper is rolled up to form a bead, you won’t see the print at all, but rather a unique design!
Cold glue and a paintbrush ~ A small squeeze bottle which makes application much easier
Wooden skewers
A metal ruler
Sharp craft knife
A pencil or pen
Beads ~ In your choice of colours, designs, sizes, quantities, etc.
This is of course optional – you could make paper beads using a selection of papers and use only these instead of a mixture of beads on your bracelet or necklace…
A clasp and crimps
Beading wire or elastic
Clear varnish ~ I used ‘Satin Finish’ decoupage varnish, but you could also use a spray varnish which is much easier to apply…

Begin by cutting a strip of paper that is 200mm wide and mark 20mm spaces along the top edge.
Do the same at the bottom edge, but make the first mark 10mm inwards.
Now draw a line 30mm in from the top and bottom, to use as a guide when you apply the glue.


Join the marks at the top and bottom and cut triangles out with your craft knife and metal ruler.

Place your first triangle top side down and smear a thin strip of glue in the middle.
Do not place glue beyond the guide lines.
Use your craft knife and cut a groove about 25mm deep in the bottom end of a wooden skewer.
Insert the triangle into the groove, as shown in the photo
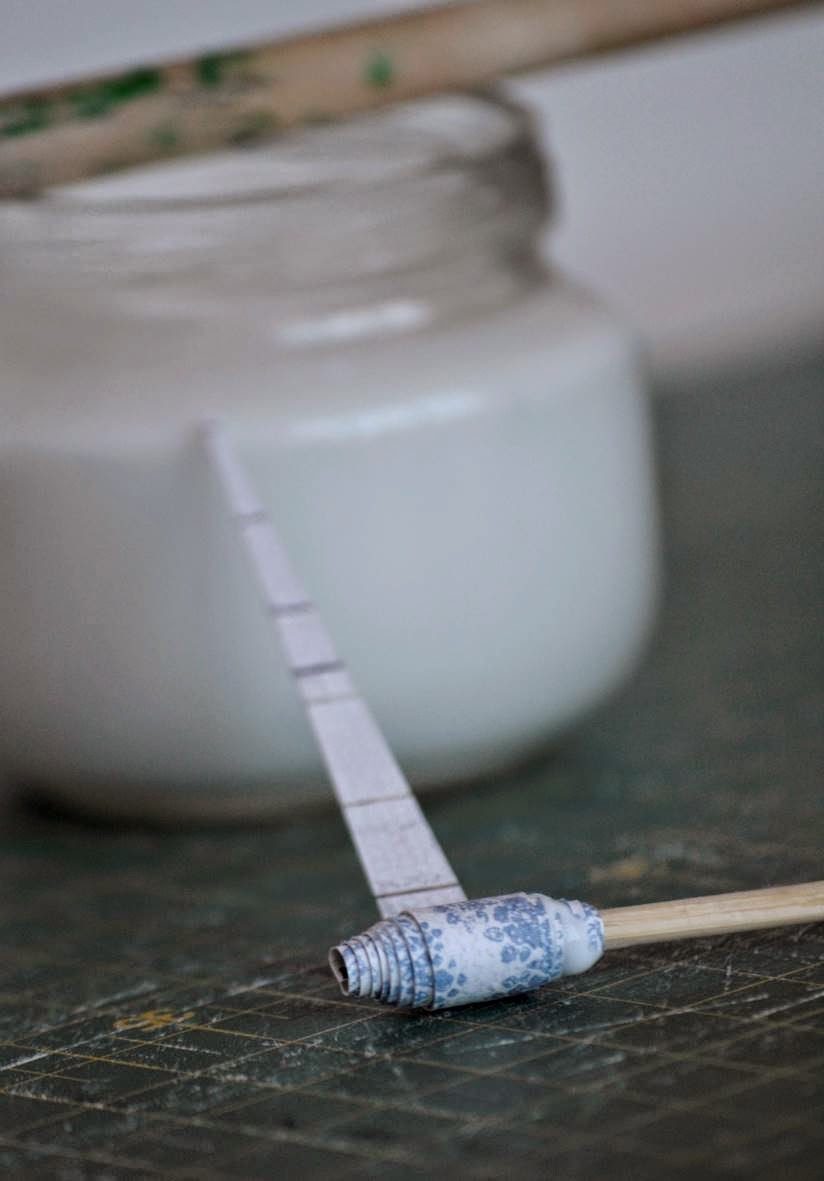
To make the paper bead, begin to roll the paper around the skewer.
Roll neatly so that the point finishes in the middle.
If glue comes out at the sides, you can just rub it over the paper so that it sticks better. This will also strengthen the bead.

Remove the bead from the skewer and push the sharp end of the skewer inside the roll to smooth the end that was in the groove against the inside of the bead. Leave to dry.
Don’t worry if a few of your beads don’t turn out too well as failures are inevitable – simply try again!

Make all the beads in this way…
Thread them onto skewers stuck into the bottom of foam cup turned upside down so that they stand upright.
Seal with an even coating of varnish.
Leave to dry and repeat if necessary.
.jpg)
Now for the most exciting stage of the process!
You can use your lovely beads to make jewellery!
I made a bracelet with my beads, but you could also make a necklace…

Play around with different designs till you are fully satisfied…
Then attach the crimps and clasp to the ends of the beading wire…
My kind sister loves beading and is much more nimble at this process than I, so she helped me attach the crimps and clasp!
Otherwise, you could simply knot the ends of the elastic…

…And you are done! Stand back and admire your stunning creative effort! Wasn't that fun?

I do hope you enjoyed this craft tutorial and that you are delighted with your new and beautiful accessory!
My little bracelet is to be gifted to a sweet friend of mine!
This idea has been adapted from Ideas Magazine, February 2012
~
Thank you dear Paige for kindly allowing me to post on Sunday Best and all the Rest!
I had *such* fun putting this tutorial together!
With love,
Kelly-Anne
that you also aspire to lead a quiet life, to mind your own business, and to work with your own hands, as we commanded you, that you may walk properly toward those who are outside, and that you may lack nothing.
1 Thessalonians 4:11-12


Neat idea and beautiful finished project! Awesome to see a guest post by Kelly-Anne, Paige!
ReplyDeleteDo you ever have the beads get accidentally glued to the skewers?
ReplyDeleteHello Paige! I am a friend and follower of sweet Kelly-Annes and it's a joy to "meet" you :) Kelly-Anne has made a beautiful bracelet and I absolutely love the paper beads. Seeing them drying on the skewers makes me think of those hair sticks {not sure what they are called} - wouldn't that look pretty in your hair? :)
ReplyDeleteThanks for having Kelly-Anne as a guest. Take care and blessings to you!
Hi Stephanie! Thanks for stopping by; it's good to "meet" you too. :)
DeleteThis is simply beautiful, Kelly-Anne :) I love the colors as well!! You did a great job on your guest post! Hope your day is lovely and blessed, sweet friend <3
ReplyDeletePaige- You have a lovely blog, and it was so kind of you to allow Kelly-Anne to share with everyone! Many blessings to you :)
Thank you Libby! :) I was happy ask Kelly-Anne to post for me. Thanks for dropping in.
DeleteKelpie:
ReplyDeleteThank you for asking! I have had beads stick to the skewers on occasion - but I've just pulled them off and started again...
Once you've done a few beads, you will start to see what works and what doesn't and it will get easier!
Blessings!
I see. Thank you for answering my question. I may have to try paper beading!
DeleteOhh how pretty! :) :) That was really good, Kelly-Anne! :) I love the colours!
ReplyDeleteOh Paige! Thank you for this lovely opportunity to guest post for you:-)
ReplyDeleteMay the wonderful Lord continue to grow your blog!
Hugs to you!
Kelly
Xx
You are so welcome! Thanks for posting!
DeleteHugs to you too. :)
These look so pretty!! I received a paper bead maker for Christmas about 20 years ago. I wish I knew what ever happened to it! It's so cool to see a tutorial on how to make them with fairly in expensive supplies! Thanks for sharing!!
ReplyDeletePaper beads are super cute! i was thinking about doing a diy post on them on my blog too! :)
ReplyDelete-Jenna <3
Follow me? The Chic Cupcake
Thanks for commenting Jenna! :) I will check out your blog.
DeleteVery nice! And so helpful for those who are learning how to make paper beads. I have an Etsy shop that offers precut paper strips for making paper beads, paper bead rollers, and paper bead kits. One of my customers purchased the kits for their church so the kids could make paper beads. I thought that was such a wonderful idea! But if any of your readers would like to make the process easier, I invite them to visit my shop www.etsy.com/shop/GroundZeroCreations
ReplyDelete